Tampilkan postingan dengan label chalkboard paint. Tampilkan semua postingan

Senin, 04 April 2016

Chalkboard Painted Eggs


Two weekends ago Lillie and I made tons and tons of Easter eggs. Here are the last ones I haven't posted yet. I wasn't happy with the photos of these ones so I had planned on rephotographing them but then somehow a few of them "cracked"....not quite sure who the guilty part was seeing how Jon and Lillie both claimed it wasn't them. =) They were in a spot that although Lola couldn't reach she could definitely have bumped so for now the blame will fall on her tiny little shoulders. =) Anyway, now I can't rephotograph them so I will just have to use these pictures. 

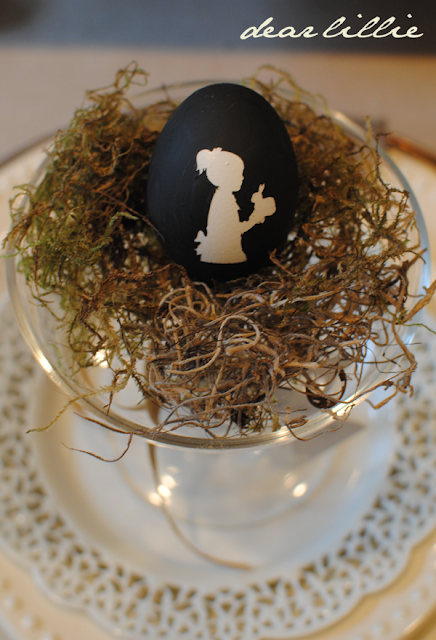
I had seen these lovely eggs on The Red Thread. I loved them but they were $35 a piece - yikes! So when we were busy making the other Easter eggs I figured it couldn't hurt to try to add some chalkboard paint that I had left over from our kitchen island and framed piece and see what would happen if I tried it on a few of the fifty million eggs Lillie and I boiled.

Once they were dry I just wrote our names on them with chalk. So easy! Although I wish I had taken a bit more time when writing the names which is why I wanted to rephotograph them. Oh well, maybe next year!

On the other side of the egg I put one of the vinyl silhouettes and then just painted over it and then peeled off the vinyl.


And that is officially the last of my Easter Egg posts! Whew - I am sure you were all getting sick of endlessly seeing eggs on here!

I hope you all have a fabulous Wednesday!


Selasa, 15 Maret 2016

Chalkboard Frame

Since Christmas I have just had some random things over here on this little wall between our family room and kitchen. In early February I moved our little hot chocolate station over here for easier access and so I could decorate in the dining room. I will probably keep it out just another week or two and then once the warmer weather is here for good I will put it away. I think Lillie will be quite disappointed seeing when the chocolate bits are moved and she won't be able to "sneak" any more. I haven't let her in on the fact that if she asks to "sneak" two chocolate chips it kind of makes it not sneaking. =)

I was torn on what to put above here since I moved everything around in the fall. I had a canvas of the girls over here the past month or so but it wasn't the right size. I had a few ideas for something I could make but then when I was cleaning the garage I found an old framed poster and figured I could add some chalkboard paint to it while I was cleaning. And sure enough, by the time the garage was clean I had something new to hang on that little wall! Yay! It will probably be temporary until I can do the larger project I have it mind but for now I really like how it looks. Especially seeing how our other chalkboard wall (you can see the whole post here) is really more for Lillie:

(sorry, phone pics aren't the greatest)


 Anyway, here is the old framed poster that was in the garage. (I had painted the frame a few years ago).

First I taped around the edge and rubbed some sandpaper on the poster in hopes it would flatten out the bubbles and make the paint adhere easier although I doubt it was necessary:

Then my helper rolled on the paint and I trimmed the edges.


Nice and simple and best of all FREE!

I feel like our family room is starting to feel more complete!


We got e-mails asking what we used for our hot cocoa station when we showed it back in January. There are two types of cocoa, marshmallows, white chocolate chips, semi-sweet chocolate chips, and vanilla.


 The Bunny Silhouette Pillow Cover in our family room is now for sale in our shop! My sister, Jamie sketched out this adorable bunny for us! I love how it turned out. Perfect for Easter and spring! I also think it would be adorable in a nursery.

The Bunny Silhouette is also available as a paper cutout!


It's available in two different sizes and along with cream, is also available in a variety of pastel colors!


I hope you all have a blessed Thursday!


Sabtu, 30 Januari 2016

A Chalkboard "Wall"

This post was written a few days ago, but automatically set to post this morning. Other than this, we will probably not be able to respond to any emails, FB posts, or any other things for a couple of days. We ask that you please keep our extended family in your prayers.


I have been in love with all of these chalkboard walls I have seen over the last couple of years. One of my FAVORITE ones by far is Jennifer's over at The Old Painted Cottage.  Anyway, as much as I wanted one I couldn't figure out where we could put one. Because we live in a townhome that has a pretty open floorplan we just have a few huge walls and not a whole lot of smaller ones. Because I couldn't find a wall that would work, I pretty much just gave up on the idea for a while. Then recently I thought it couldn't hurt to try it on the end of our island cabinets. It was the perfect spot for Lillie to be able to reach and draw on. So, we gave it a try! At first we painted the end near the dining room (those are the photos shown in the step by step part) but when you walked through the front door you immediately saw it and it was a bit jarring. After starting at it for a week or so it just kept driving me crazy so I ended up painting back over it and hanging the IKEA rod with the basket and painting the other side with the chalkboard which I like so much better! 

Anyway, here is how we did it:

First, find a fun little helper and get some chalkboard paint. We got ours at Ace Hardware but I am pretty sure you can get it about anywhere. Then we just used a paint tray, a little mini roller, some tape and little brush.

Then we taped off the trim and put down a towel.

And then we started painting.

And in case you think that the photo above is just for the blog take a look at the first coat - haha!
Once she went to bed I added a second coat to "clean it up" a bit.

In the end, though, we ended up painting over it entirely and we painted the other side instead, which I like so much better!


And here is the other side which we painted back over and added these IKEA rods to.


I hope you all are having a splendid Monday!